With the arrival of summer (finally!) many of my friends are also expecting the arrival of their new babies. And the arrival of new babies means Baby showers!
I love these celebrations of new lives and new families. Every time I attend one I am always reminded of how wonderful the baby days are. *Sigh*
Thinking back to all of the gifts I received at my baby showers, I have a special place in my heart for the ones that were homemade. I loved the idea that someone took the time to make something special and unique for my baby. Now that I can do a bit of sewing I am quite excited that I can make something special for friends and family when their little ones come along.
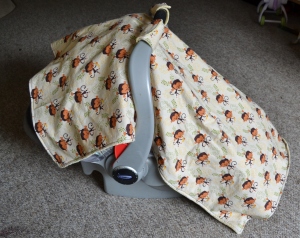
A co-worker of mine is due any day with her baby boy. Being the proud mom of 4 girls I love getting the opportunity to make boy things (even if it means just using a non pink fabric). I decided I wanted to make something useful for the new Mom and her new little man and after much thought I decided on this:
Car Seat Cover
I saw something similar to this when I was at the park a few weeks ago. They looked fairly easy to make so I thought I would give it a try. They are super useful too. They block the sun in the summer, keep the cold and wind out in the winter, and if you don’t like people touching your new baby when you are out and about, they are wonderful shields too!
You will need:
2 pieces of fabric 29″ x 39″ ( one printed cotton and one for the back, I used minkee for this one)
4 pieces of 4″ x 8″ fabric ( 2 from the printed cotton and 2 from whatever you are using for the back)
2 pieces of 3″ x 1″ velcro
Matching thread
Here’s how you make it:
1. Take your two 29″ x 39″ pieces of fabric and place them with the right sides facing
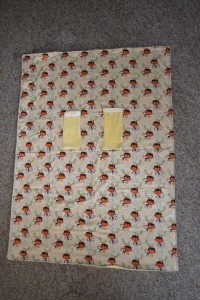
and pin the outside edges together. (Don’t you just love the monkeys?)
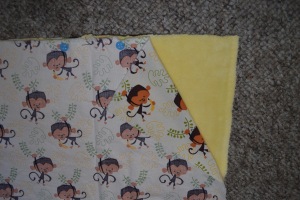 2. beginning around the halfway point on one of the sides begin sewing the edges together leaving an opening of about 6 inches to turn the blanket right side out.
3. Using a knitting needle, or whatever long stick like item you may have on hand (I used a wooden chopstick) push the edge seams and corners out. Topstitch around the outside of the whole rectangle including the unsewn opening (be sure to fold the edges in before you topstitch it.
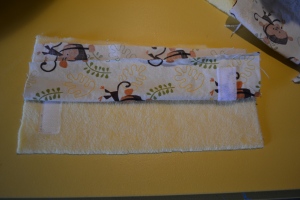
4. Take one of the printed cotton 4″ x8″ rectangles and sew the hook side of one of the velcro strips about 1 1/3″ from the top of the right side. Sew the fuzzy piece of the velcro to the top of the right side of the minkee piece, about 1 1/3″ from the top.
5. Take the pieces of fabric with the velcro and place them together like they are in the picture (It might seem like it’s wrong but it’s right, trust me!)
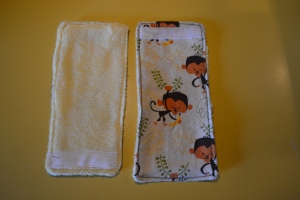
6. beginning on one of the sides stitch the edges leaving an opening to turn the tab right side out. Using your knitting needle push the edges and corners out. Topstitch the edges all the way around, being sure to close up the opening as you go. Repeat steps 5 and 6 to make the second tab.
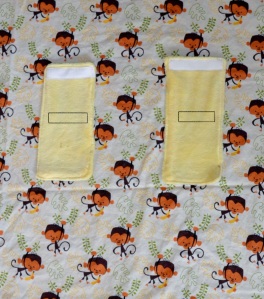
7. About 13″ from the top of the main piece place the tabs and pin them in place.
Sew them on to the main piece, through both pieces of fabric ( This will prevent the layers from separating when it is attached to the handle of the car seat) by sewing a rectangle shape in the center of the tabs. I drew the rectangles on the picture to make the directions a little clearer.
That’s it! If you need clarification on any of the directions just leave a comment and let me know. Thanks for stopping by.


Very Cute! I was posting my own Car Seat Cover tutorial on Skip to My Lou’s linky party and saw yours! Come on by and check mine out also.
oh how i wish i had one when my kids were little! that is the best idea ever