Caramel Apple Cake

I have a beautiful little 2 year old who loves to bake.  So much so that she will often go to her kitchen with a collection of goodies  she has scooped from my kitchen.  Sometimes  I go to the microwave and find that she  has put a collection of things there too (I am so grateful that  she  doesn’t know how to turn it on yet!). So when little Miss  asks to bake I do try to accommodate her.  It also helps when it’s my turn to  bring treats for my ladies group. Quite frankly any excuse to bake and I usually take  it.  I love to get in my kitchen and create.  This is what I  came up with.

I was on Pinterest the other day and saw this:

Now I am  betting  that it tastes even better than it looks but this is not the  kind  of thing that  I  have the time to throw  together  on the average day.   So I  decided to try something a little more low key.  Now   I will admit my cake  is a lot  less fancy looking  but it is huge on flavor.  Yumm-o!

Here’s my recipe:

Caramel Apple Cake

Preheat your oven to 350 degrees F. Grease a  9×13 inch pan and set aside.

Cake:

3 1/4 cups all purpose flour

1 3/4 cups packed brown sugar

1 teaspoon vanilla

1/2 teaspoon  salt

1 ½  teaspoons cinnamon

4 eggs

1/2 cup vegetable  oil

½ cup butter

1 teaspoon baking soda

3 cups finely chopped apples

Caramel Glaze:

1 1/2 cups  packed   brown sugar (I prefer light brown sugar because it adds to the caramel flavor)

1/3 cup  butter

1 teaspoon vanilla

½ cup  cream

1 cup  finely chopped pecans (optional, and very tasty)

Combine the flour, baking soda, cinnamon and salt in a medium bowl . In a large bowl, mix the oil, butter and sugar, add the eggs and  vanilla and beat well.Stir in the dry ingredients until just moistened. Add in the apples and stir until coated.

If you like smaller apple chunks  you can definitely  make yours smaller than I did,  you could actually  grate them up if you don’t like  bigger pieces.

Pour the  batter into prepared pan and bake for  about 50  minutes, or until a toothpick inserted in the center comes out clean.  With a skewer poke  holes  all over the  top of  the cake, the more the better.  This will allow the caramel to  soak into the  cake adding pockets of caramel goodness

Combine all the caramel glaze ingredients into a saucepan. Cook over  medium  heat, stirring constantly until the mixture thickens up, about 5 minutes, it  should come to a soft boil.  When  it  reaches this point  pour the caramel over the hot from  the oven cake.

I used a  pastry brush to  spread the caramel over the  top and to stop the glaze from  pooling around the sides.

One of the great things  about the  glaze is that when it sets it  leaves a  slightly crunchy texture on top.  It makes a  really nice contrast to the moist crumb of the cake and the soft apple pieces.


If you give this  a try I would love to hear what you think.  Thanks for stopping by!

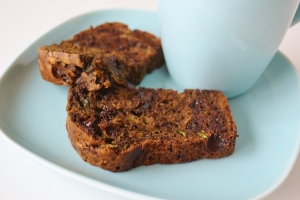
Coffee Chocolate Chip Zucchini Bread

It  snowed yesterday.  A lot.  Well, a lot for Victoria.   Victoria  is  not a  city  known for snow and when  it  does snow more than a  couple centimeters the whole city shuts down.  When I woke up   to almost 10 centimeters  I knew that we are housebound for the day.

My  girls played outside, my husband stayed home from work  and I  played around in the kitchen.  I  love it when we have days at home and I can get creative. I  wanted to try  something  a little different  for me and since I was already missing my  Tim Hortons coffee which I was clearly  not going to  get,  I decided to  try and concoct a  coffee flavoured treat.  I am  really  happy with the way this turned out.

I think the  flavor of the coffee and  the chocolate chips  compliment each other nicely.  The coffee flavor really pops especially because this is not an overly sweet  bread to begin with.

Here’s the recipe:

3 cups Grated zucchini (about 5 small zucchini)

1 cup Organic Cane sugar (if  you don’t have this on hand you can use 1/ 2 cup of                  white sugar and 1/2 cup brown sugar for a  similar flavor)

2/3 cup olive oil

2 tsp pure vanilla

4 eggs

3 cups flour ( you can  use half whole wheat flour if you have it and the coffee will mask the flavor)

2 tsp baking soda

1 tsp salt

1 Tbsp cinnamon

4 Tbsp coffee granules dissolved in 2 Tbsp or warm water

1 cup chocolate chips

Preheat your oven to 350F.

Combine the  zucchini, sugar, eggs, oil and vanilla in a large mixing bowl. Dissolve the coffee granules and add them into the wet ingredients. In a separate bowl mix together your dry ingredients.  Add the dry ingredients to the wet mixture and stir until just combined.

Stir in the chocolate chips.  Add  however many you like. About a  cup is quite generous. And that`s coming from a chocolate lover.

This recipe makes one REALLY large loaf or  two small loaves.  It  lends itself really nicely to muffins as well.

Bake for 50-60 minutes. Until a  toothpick inserted into the middle comes out clean. Cool and enjoy. It`s a perfect treat for a cold day.

What do you like to  do  when the  weather keeps you at home

New Inspiration!

At Christmas, while my family was  spoiled with  toys, video games and other gifts under the  tree, I was spoiled with gift cards from my wonderful husband. The second I opened them I  knew what I was going to use them for.

Ever since a friend of mine showed me how to use  my sewing machine I have been making trips to the library quite often.  I  have  taken out every sewing book that I can get my hands on.  For the most  part I don’t  get to read  very much of them  before I have to head back  but I still enjoy the tiny bits I get through.

There are a few that I have taken out more than a couple of times so I figured it was time to add them to my library.  The  first is Weekend Sewing by Heather Ross.

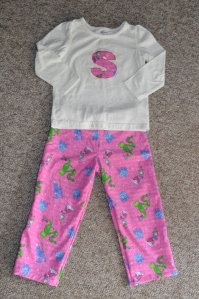
There are so many great projects in this book that I have been wanting to try.  Tunics, bags, a play tent and little girl dresses too.  I used the  pajama bottom pattern from the book to make these:

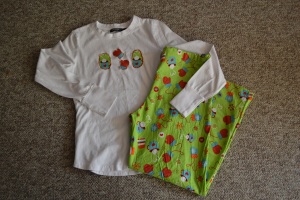
And these:

And four  other pairs of PJ bottoms  that my family wore on Christmas morning.

Growing Up  Sew Liberated by Meg McElwee is another favorite of mine that I knew I  had to have.  

My plan for  Christmas 2012 is  to have a  75% Handmade Christmas (yes I know it’s only January but if I start planning now  perhaps it will happen).  This  book has a variety of  patterns;  a teepee,  toy bins, dolls, papooses, capes, art satchels and more. I  think I will be able to  finish almost all our  gifts for my four girls from this  book alone as well as some of the other little ones in my life.  If you are looking for some great  gift ideas for some  special little people in your life this would be a perfect  place to start.

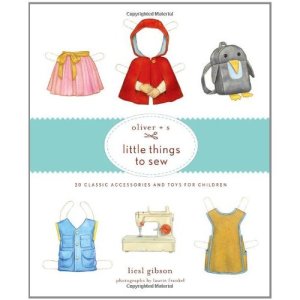
Oliver +S, Little Things to Sew  is a book  that I was drawn to immediately because of the adorable paper doll clothing images on the cover. I mean seriously,  how cute are they?  So yes, I  judged this book by its cover and was not disappointed. Super cute  projects like art smocks, backpacks, hats, messenger bags and a fantastic pattern for a  Bento Box carrier that I will definitely be making.  There is also a  quilt in there  that I will be trying to  make despite the fact that my previous attempts have been less than successful. Practice makes perfect right?

Now  there is still one book that I haven’t added to  my  collection but I will one of these days.  Wee Wonderfuls by Hilary Lang.  This  book is packed with beautiful dolls.  B-E-A-U-T-I-F-U-L dolls.  Couple of my favorites are the Ellie backpack, the Tag along doll (which has an accompanying pattern for an apron that she  can be carried around in) which my girls have been begging me to make for them and  a few little critters  that would be a welcome addition to any child’s room.  If  you have some time you should check out her site http://www.weewonderfuls.com/ it is totally worth a visit and  I am  sure you will love her work as much as I do.

I  figured that  buying these books would  be a good financial move especially considering the amount of fines I racked up from the library.

So  now that  I am  dripping with inspiration, I  just  need  to find a bit of time to  get it all done.  Easy Peasy Lemon Squeezy Right?

What  projects do you have  planned for yourself this year? Where does your inspiration come from?

Oh Deer.

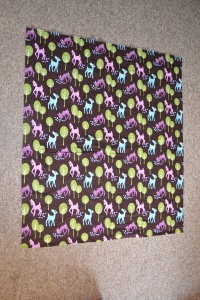
I wonder if there is anyone out there who loves Michael Miller Fabric as much as I do.  My newest favourite of his  is the Pet Deer fabric.  It is so sweet.  The  little deer and tree pattern  is a perfect fit for  my youngest daughter’s room so when I came across it a at the fabric shop I  had to have it (my husband disagrees with this statement but I bought it anyway).

We have  gotten into the habit of  keeping our babies in bed with us mainly because I means I get more sleep but we are now approaching the time where our youngest daughter needs to transition to her bed.  I have  kind of been dragging my heels this time around  because she is our last baby and I love the closeness  of having her sleep with us.  However… being the  grown ups that we are, my husband we have decided that  Camryn needs to  go into her own bed.  Can you imagine anyone not wanting to snuggle this little one all night?

Anyway, the  last  barrier to starting this transition  has been  me sewing her  bedding set. You can imagine that in a  house with 4 little girls there isn’t a ton of time to sew but over the last few days I have managed to  work on it and finally finished it.  I think it’s pretty sweet.  I  made a  simple crib ruffle and  baby sized duvet cover for a  down duvet that my mom had picked up over the summer.

The cover was actually quite easy to make.

I measured the duvet and added an inch to each side for  seam allowance and  to  give me a bit  of  extra room to topstich a  small edge around the outside  of the  cover.  Then I  cut my  deer fabric.

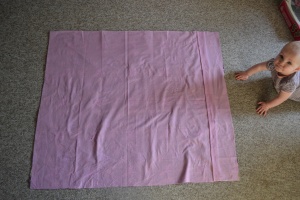
For the back I chose a  co-ordinating  purple cotton.   I didn’t  want to  use snaps  on the  backside and did an  overlapping flap instead so the cutting was a  little different.  Instead 1 piece there were two.   In the  picture you can see there is a 3 inch overlap.   I think next time I would probably make it a 5  inch over lap.  (I love the little baby fingers.  I couldn’t bring myself to  crop them out of the picture.)

I did a hem (is it  still called a  hem if it’s not on pants?) on both pieces of the back fabric before  placing it onto the front fabric. I made sure the  deer were right side up and that the  short flap was at the bottom of the cover.

I pinned around the edges and sewed around the outside, turned it rightside out and  did a  quick topstitch around the outside edge to give it a  finished look.  I  think it turned out pretty  good.

I  think she likes it too! If  you look in the picture  you can see  the white duvet a bit,  I think a  bigger overlap would help this a bit. I looks great  with the matching ruffle I made for it and the tree on the wall of her room too.

Sigh… well unless you can think of any reason why she can’t sleep in there I guess we start the transition. Can you think of any reason??

How Not to Quilt: An Untutorial

Before I  begin the untutorial I would like to  mention a few things.

1. I  hate minky.

2. I have made one  quilt with a great deal of help.

3. I am a LAZY Sewist.

Ok here we go.

The Untutorial

Step 1: Choose a difficult fabric (preferably one that requires a higher level of  skill to work with than you currently have)

I chose minky to make this  quilt.  Minky is finicky. It is stretchy and fuzzy.  It  covers your clothes with fuzz and fluff. It gums up your sewing machine with fuzz and fluff, it covers every floor, desk and work surface with fuzz and fluff.

Step 2: Don’t  pin anything together before you start sewing. Seriously.

Rather than wasting time pinning fabric together  just sew.  This  will produce uneven seams and patterns but think of all the time you will save!

Step 3: Rather than fix your mistakes as you go leave them all to the end and then try to fix them by stretching the material.

This  will leave you with  uneven lines and edges  but again, think of all the  time you will save.

Step 4: Rather than attempting  to properly bind the quilt, use a rolled hem and cross your fingers.

Because the  fabric was so hard to work with I had no idea how to  do a traditional binding for it so I decided to wing it.  The  results were not good!  The edge I  sewed  is  so uneven because I was using 2  hands to hold the  hem in place  so I wouldn’t have to pin it.  Seriously.

Step 5: Go to the  store and buy a  gift to replace the quilt you were initially  going to  give your family member for a baby shower gift.

Do  you  ever  do something  and think to yourself afterwards “What was I thinking?”  That was totally  what this  was for me.  There were a few positive things though.  First of all I  got some experience working with minky.  Secondly i  learned the value of  pinning. Thirdly my  girls now have a  cozy blanky for their picnics.

So there you have it.  My first (and hopefully last) untutorial.  Please tell me  that  some of you have created disasters too?

Goodbye Christmas!

I  love Christmas.  Like seriously love it.  My tree goes up mid-November, which  drives my poor  husband  crazy, so we I can  enjoy the  season for as long as possible.  So  when  Christmas  is  over I always feel a  little bit sad.  We  had a  wonderful Christmas but when boxing  day is here I want to take the tree down and put my  Christmas goodies away.  I want to  get  my home  back in order.

Along with the end  of  the  Christmas season comes the dreaded New Year’s Resolutions.  While  it is a  time  for new beginnings I seem to fall into the same  patterns that most of  us do when It  comes to  resolutions: Go  big or go home.

This  time around I  am trying a new approach. I  have a few things that I  am going to work on this year. Things beyond the  lose weight and  get healthy resolutions of  years past. Here’s  my list:

Bloggy Goals:

I  am  shooting for 45 posts this year.  I have a ton of ideas for posts and I have started  a list of  crafts and  cooking projects I am  going to try.  Plus I  got a  serger and I am  super excited to  learn how to  use it.

Family Life:

This is always a  tough one for me.  Being the mom of  4  little girls doesn’t allow me too much time  to  do  Mommy dates with my  girls but my  goal is  to do a Mommy date with each of  my girls once a month.   Daddy gets  2 dates a  month  which will work out  well  because  for  Christmas the wonderful man  planned and  paid for 6 dates for us (ranging from  his and hers massages to a cooking class for us to do together – yes I  know I am lucky!)

Personal Goals:

Ok yes  losing weight is  on the list for this  year but not in  the crazy Biggest loser way that I  always think  I  will.  I  am  committed to  moving more and  eating less.  That’s it.  Easy peasy – Right? lol

How about you? Any resolutions you would like to share?  Goals for the  new year?


Bloggers Choice!

I know it’s been a while  since my last post  but I came across this “blogger’s Choice giveaway” and I  just couldn’t help myself.   I  am a fabric junky.  I never thought  those words  would come out of  my  mouth  but the more  sewing I do, the  more I find  myself  drooling over fabric.  In fact I  have a ton of  fabric in my  possession.

When I saw this  giveaway I  thought it would  be a  great opportunity to  get back to  my  blog and possibly add to my  fabric stash.

If  you are a sewist and  have a  bit of time, head over  to Quokka Quilts and check out  how to enter.  At the very least it will give you a chance to  drool over the huge selection of  fabric at the Fat quarter shop.

Here’s my submission:

FQS Giveaway

Here’s a  list of the fabrics I  chose:

Hoo’s in the Forest Cute little Blue Trees

Hoo’s in the Forest Green Sweet Trees

Hoo’s in the forest Pink  sweet trees

Hoo’s in the forest Pink Plaid

Meadow Friends Cotton Posie Pink and lotsa dots

Meadow Friends Cotton Pond Blue and lotsa dots

Hall of fame Yellow Game

Stella Pink Solid

Stella Yellow Solid

Stella  Turquoise Solid

Bella Solids Light Pink

Enjoy  your  search.  I  hope you have as much  fun as I did!


A Rainbow Fairy Party!

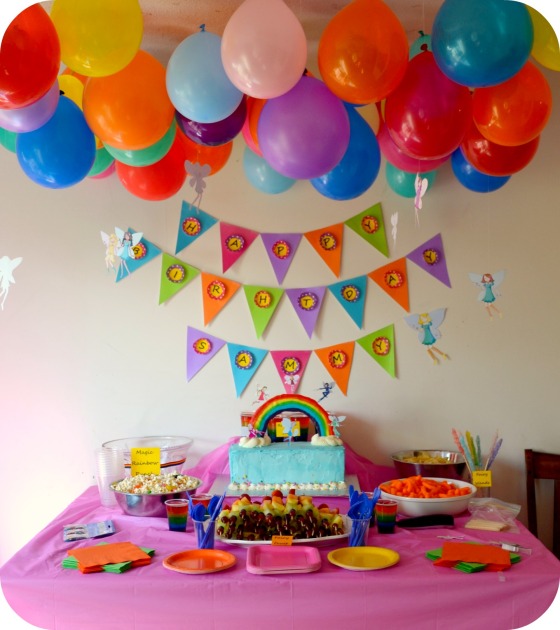
My sweet Sammy girl turned 6 a couple weeks ago, holy is time ever flying by! Sammy is about the most girly tomboy you will ever meet. She loves dresses and dirt, sparkles and mud. So when her birthday rolls around I am always curious to see what theme she will pick for her birthday. This year it was girly! Hurray for me!
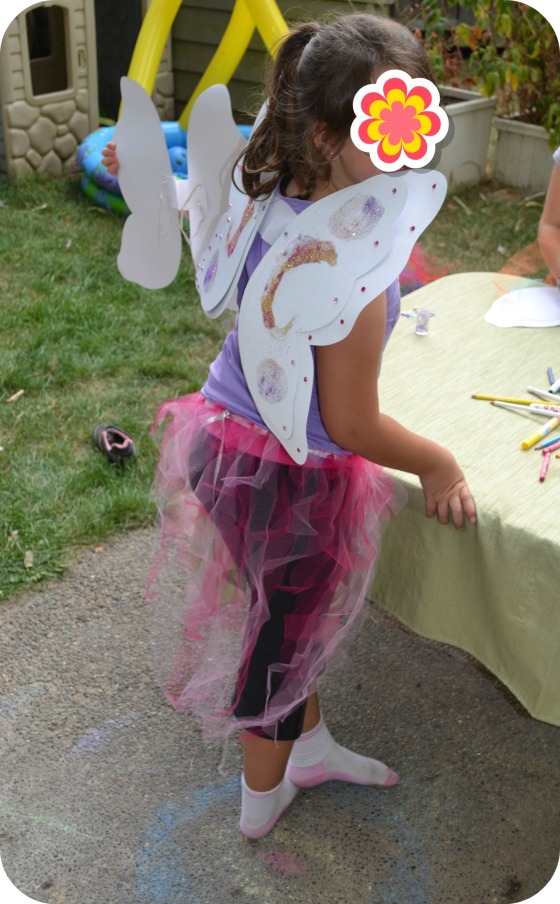
She settled on a  rainbow fairy  theme which  was  great because I  had  been  pinning a  ton   of rainbow ideas on Pinterest.   Incorporating   fairies  seemed  to be  the tricky part  until  I  stumbled across the Rainbow  magic  website.  They  have this lovely “create a  fairy” activity  so   we went to the  site  and Sam  spent  about an hour designing and printing  out  fairies (I spent a lot longer  cutting them out!).

For the  activities we  decorated fairy skirts, wands and  wings.

The skirts were super simple to make.  I tied a length of elastic in a circle and then had the girls tie strips of  different color tulle on it.  I found that tying on 4 or 5 pieces at a time on really helped speed things along and also made a fuller looking skirt.  The wings came from Michaels and we decorated them  with glitter,  glue, feathers, jewels and markers.

There are a ton of ideas on pinterest for rainbow parties so I  found some fun ideas  there for the food.

The  jello was easy.  We made the jello colors separately and  added a new color  when each layer in the cup had set. We made fairy popcorn (popcorn with jelly beans  sprinkled on top) and “Magic” punch.   The  week before the party I took the punch cups and put a couple drops of food coloring in the bottom of each one.  I did different colors in each one and allowed them to dry before the party.   The  punch was made of 7-up and white cranberry juice.  When  the  guests scooped the  white punch in their  cup it “magically” changed colors.

The  fairy wands were a big hit.  The  girls started  working on those in August and they  didn’t  turn out  quite as well as I   had  hoped they would.  They  were pretty skinny and  we decided after  using 12 pounds of sugar that we were  just going to leave them that way!

We also had Fairy Fruit

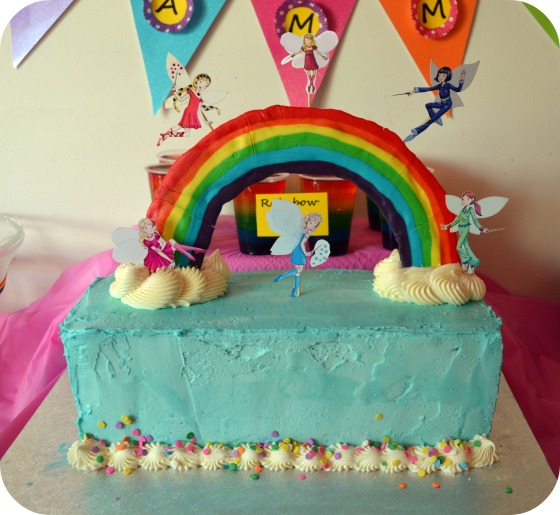
But the favorite  thing of the day was the cake.

I  used marshmallow  fondant to  make the rainbow on the top of the cake.  The inside…….

 A rainbow of course!  I was a  fun party.  The girls  had a blast and  the  birthday girl was thoroughly impressed.

National Cheesecake Day!

Did you know that National Cheesecake Day even existed?  I definitely did not but  what a  lovely excuse to make one!  Cheesecake is  my most favorite  dessert ever.  I  love everything about it and I  have yet to  meet a piece I didn’t like so I decided  I  was going to try one I had never made before.  Since blueberries are in season and one of my favorite activities to do with my girls is picking berries at the local U-pick farms,  I  decided  blueberry cheesecake  would be a  perfect choice.

Blueberry Cheesecake

Crust:

1 1/2 cups graham cracker crumbs

2 tablespoons sugar

1/3 cup butter, melted

Filling:

3 1/2 8 ounce packages of cream cheese

1 cup sugar

2 tablespoons cornstarch

1/4 teaspoon salt

5 large eggs

Sauce:

1/4 cup sugar

1/2 cup water

2 1/2 cups fresh blueberries

1 Tbs cornstarch

1. Preheat oven to 325°.

2. For the crust, mix the first three ingredients. Firmly press mixture into bottom of a 9-inch springform pan. I gave mine a  quick spray of Pam before putting the  crust in.  Bake at 325° for 10 minutes; cool on a wire rack.

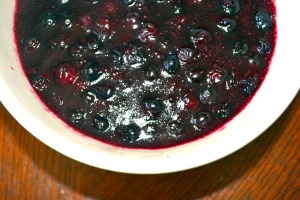
3. To make the sauce, combine 2  cups blueberries and 1 tablespoon cornstarch in a small saucepan; bring to a boil. Cook until slightly thick, stirring constantly. Cool slightly. You will need to puree about half a cup of the sauce  for the filling.

4. Place cream cheese in a large bowl; beat with a mixer at high speed until smooth. Combine 1 cup sugar, 2 tablespoons cornstarch, and salt. Add sugar mixture to cheese mixture; beat well. Add eggs, 1 at a time, beating well after each one. Pour batter over prepared crust. Pour the 1/2 cup blueberry puree over batter; gently swirl with a knife.

                     You only need a few swirls otherwise  it will be over mixed.

Don’t the colors look gorgeous?

5. Bake at 325° for 1 hour and 10 minutes or until cheesecake center barely moves when pan is touched. Remove cheesecake from oven; place cheesecake on a wire rack.  Cool to room temperature and cover and chill at least 8 hours (this is the hardest part for m!)  Remove sides of springform pan.

6.  When  your ready to serve, pour the  blueberry sauce over the top of the cheesecake or you can put it on top of the individual  slices,  either way works.

When you are  done this is what you get for all your effort:

  Happy Belated National Cheesecake Day!

Caramel Coconut Brownie Squares

It’s been a ho-hum kind of day.  Summer has arrived but the warm weather has not.  We have had a few sunny days but for the most part it’s been more cloudy skies and rain than sunshine.  So today we went to the library and then  came home and had a  jammie day.

When I get bored I often head to the kitchen in search of something new  to make to fill my time.    My hubby wanted something sweet and he always like it when I bake for him so we both win.  Today I came up with a twist on the seven layer bar.

It’s got everything a gal could want in a sugary treat.  Caramel, coconut, pecans, chocolate and  graham crackers.  I think you could even add in a  couple handfuls of crushed pretzels to  get a sweet/salty thing going on and it would be even better.


Caramel Coconut Brownie Squares

Crust:

2 1/2 cups Graham cracker crumbs

3/4 cup of melted butter

1/2 cup ground pecans

Mix the  crumbs and melted butter  together and  press into a  9×13 pan lined with parchment paper.   Bake for 10-12 minutes.

Brownie Layer:

1 cup Melted butter

2 cups of white sugar

4 eggs

2/3 cup cocoa

1 cup flour

3/4 tsp baking powder

1/8 tsp of salt

1 tsp vanilla

Melt butter in a pan,  remove from heat and  stir in  sugar.   One by one blend in the eggs.   Add  all the dry ingredients and stir.  Pour onto the crust and  return to the oven  to bake for 30 minutes.

Caramel Layer:

I package of Kraft Caramels

1 can of condensed milk

1/4 cup butter

1 cup pecan pieces

2 cups coconut

1 cup of  broken pretzel pieces (optional)

In a  medium saucepan mix the condensed milk,  caramels and butter, over medium heat stir until  the caramel is melted and blended.  Stir in  the coconut, pecans and pretzels if you are using them.  Pour this mixture over the brownie layer  and spread.

Cool for several hours and then remove from the pan.  Cut and serve.

These bars are worth the effort.  They are dense, chocolatey, chewy and rich. My only word of advice is make sure  you have someone to share them with.  Maybe a few someones.